

In SAMSON, to do some operations (inspect, edit, move, simulate, etc) with nodes (atoms, residues, molecules) it is necessary to select them.
SAMSON provides several ways for doing simple and complex selections:
- Selection commands, see the Select menu
- Selecting using the Document View
- Selection editors
- Selection filters
- Selecting using the Node Specification Language
- Python Scripting for even more complex and scripted selections.
You can try the following interactive tutorials in SAMSON (Help menu > Tutorials): "Working with documents", "Selecting in the Viewport", "Selecting using the Node Specification Language".
What you will learn from this tutorial
From this tutorial, you will learn how to select nodes in the document view, and using commands, editors, selection filters, and Node Selection Language.
What is not covered in this tutorial
For how to select nodes with the help of Python Scripting, please, refer to the Python Scripting Guide.
Selection commands
SAMSON provides a number of various selection commands that can be found in the Select menu or via Find everything... at the top of the menu.

Some selection commands are available via the context toolbar which appears when something is selected.
Some selection commands ("Select all" and "Deselect all") are available in the selection filter menu in the top-right corner of the viewport.

Hover above the commands in SAMSON to see more information on them in their tool tips.
In general, the selection commands, as many other commands in SAMSON, act as follows:
- If the current selection is not empty, then a command will select nodes from the selected ones; the nodes in the current selection that do not satisfy the command will be unselected.
- If the current selection is empty, then a command will select nodes from the whole Document.
Some of these commands have special modifiers that change how they work (see command tool tips):
- Press Ctrl / Cmd⌘ and click on the command to select from the whole document and add to the current selection, i.e. the selection will not be done based on the currently selected nodes but on all the nodes in the document.
- Press Shift and click on the command to select only among visible nodes (i.e. hidden nodes will not be selected).
- Press Alt and click on the command to select only among hidden nodes.
Note: Some commands are enabled only if the active document has specific nodes to which they can be applied (structural models, atoms, etc) or only if something is selected (for commands that act on the selection).
Selecting using the Document View
You can select nodes through the document view which shows the hierarchical data graph of the active Document. If you do not see the document view, you can enable it via Interface menu > Document view or the Ctrl + 1 shortcut on Windows or Linux or Cmd⌘ + 1 on Mac.
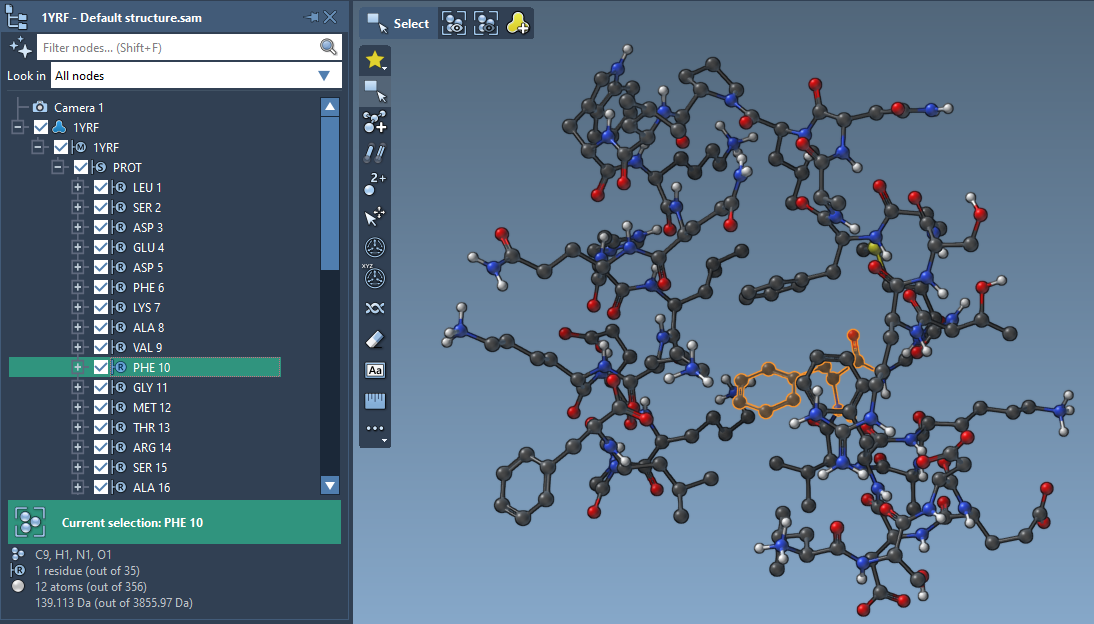
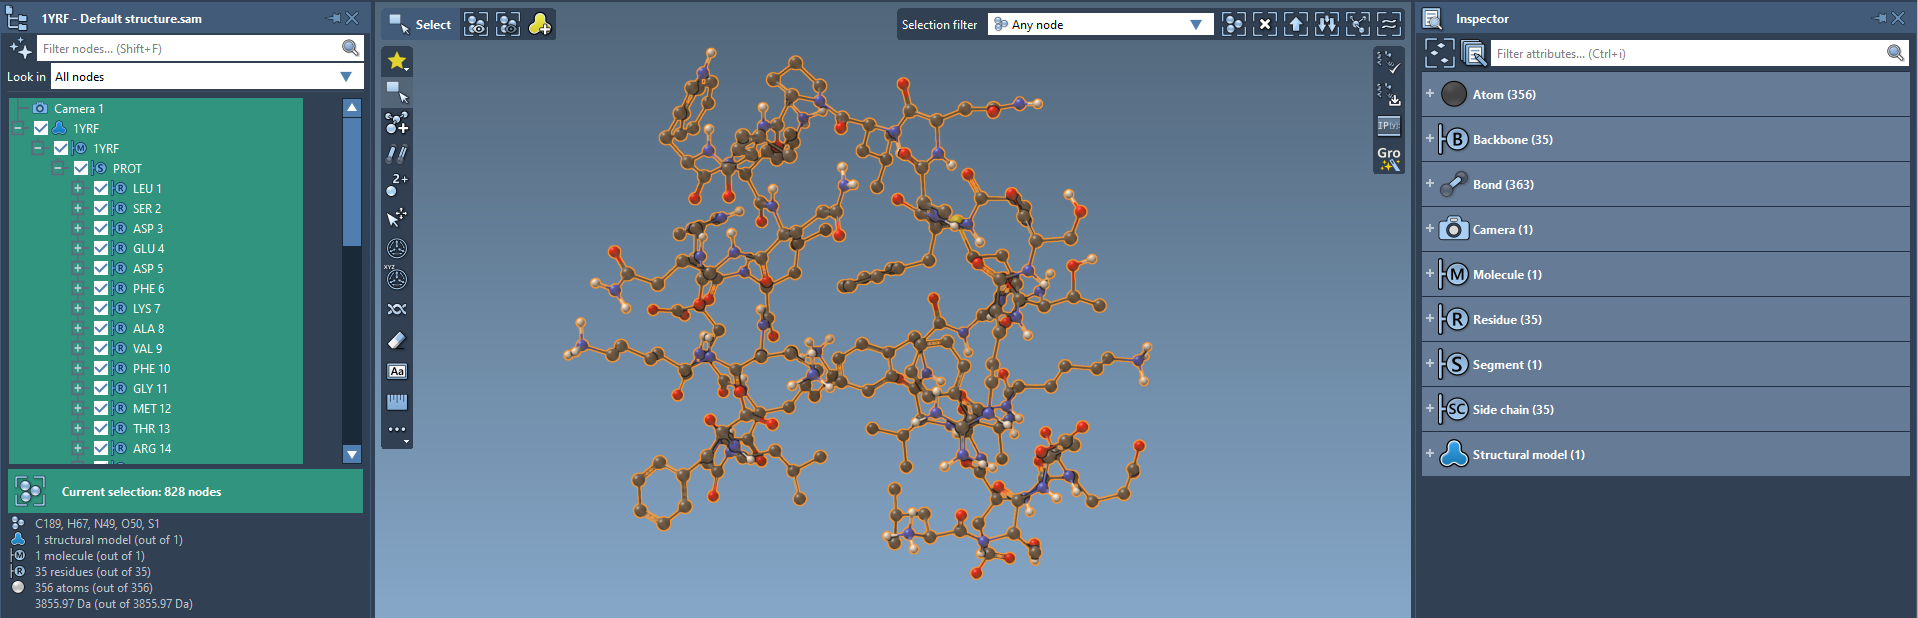
Open a molecule, e.g. "1YRF - Default structure.sam" from the Samples folder. To unfold a level, click on the + (![]() ); to fold a level, click on - (
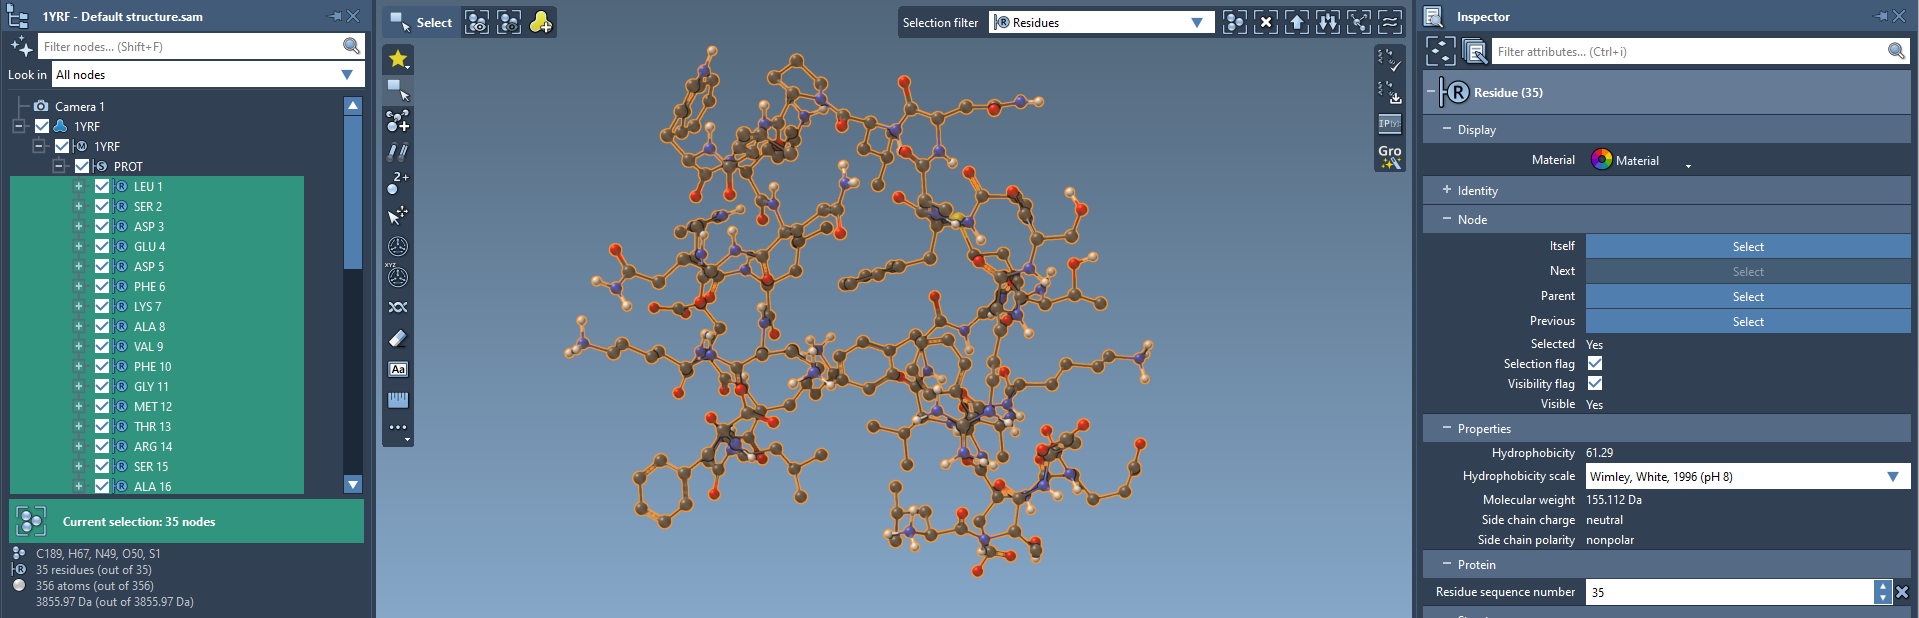
); to fold a level, click on - (![]() ). To select a node, simply click on it in the document view. For example, in the image below a residue is selected.
). To select a node, simply click on it in the document view. For example, in the image below a residue is selected.
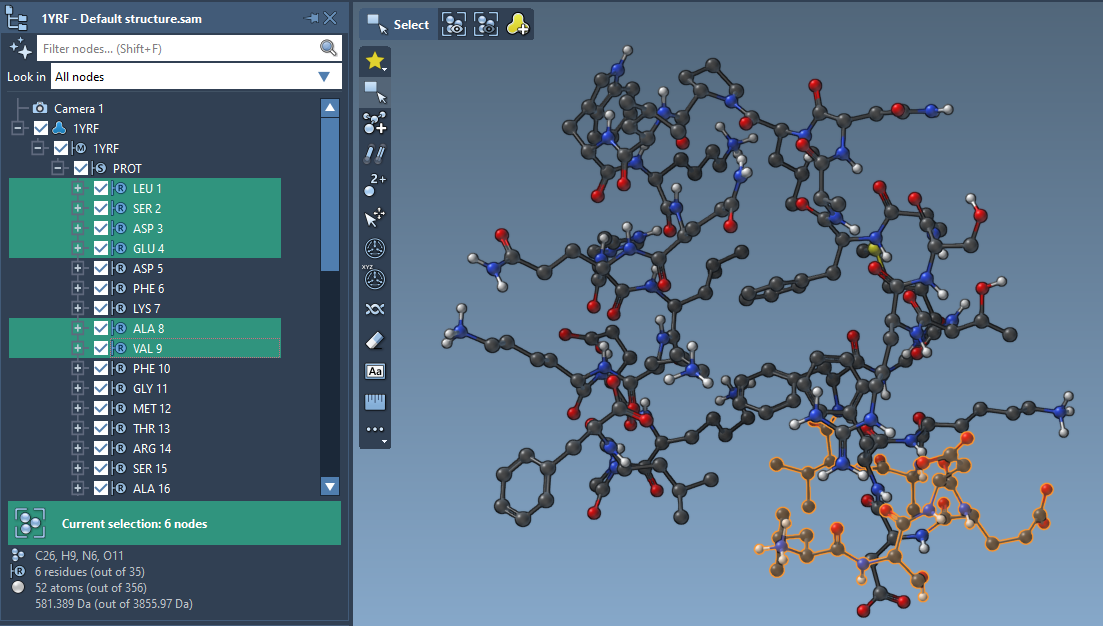
To perform more complex selections:
- Hold Ctrl / Cmd⌘ and click on a node in the document view to add it to the current selection or remove it from the current selection if it already was selected.
- Hold Shift and click on a node to select nodes consecutively.
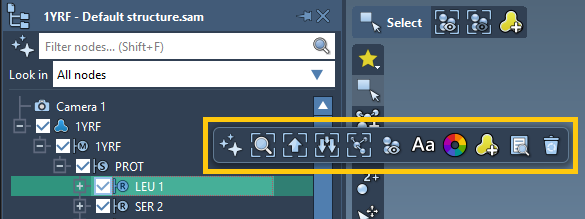
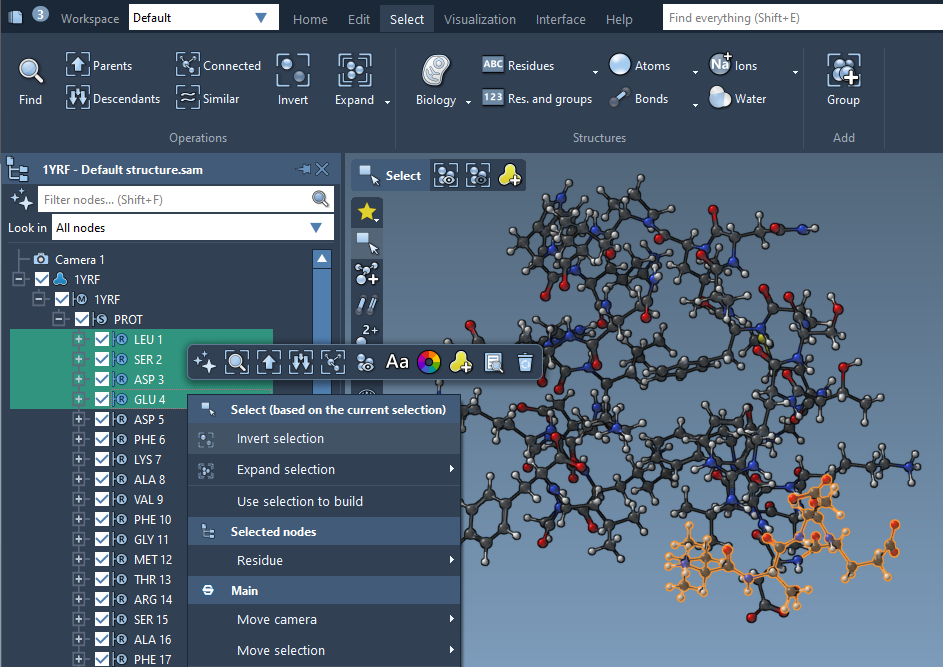
When selecting nodes, a context toolbar appears with specialized actions. It gives you a quick access to some actions that can be done on selections and to some general actions.
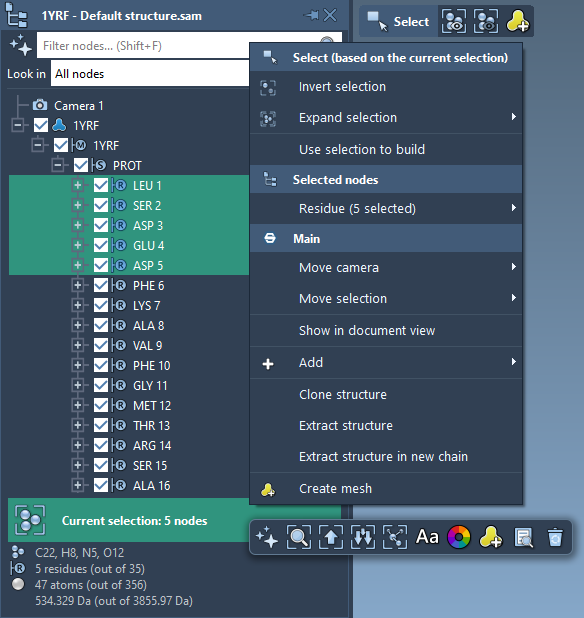
At the bottom of the document view you can see the selection summary which shows the number of selected nodes, and below it you can see some other statistics. Click on the selection summary or right-click on the selection to see context menu and the context toolbar.
You can filter nodes in the document view by entering in the Filter nodes... box a string (filtering by name) or a Node Specification Language expression (filtering by properties and other complex expressions). It does not select nodes right away but only filters them. To select nodes matching the filter, press Enter .

Let's filter lysine (LYS) residues by name, type LYS in the Filter nodes... box and press Enter to select the filtered nodes.
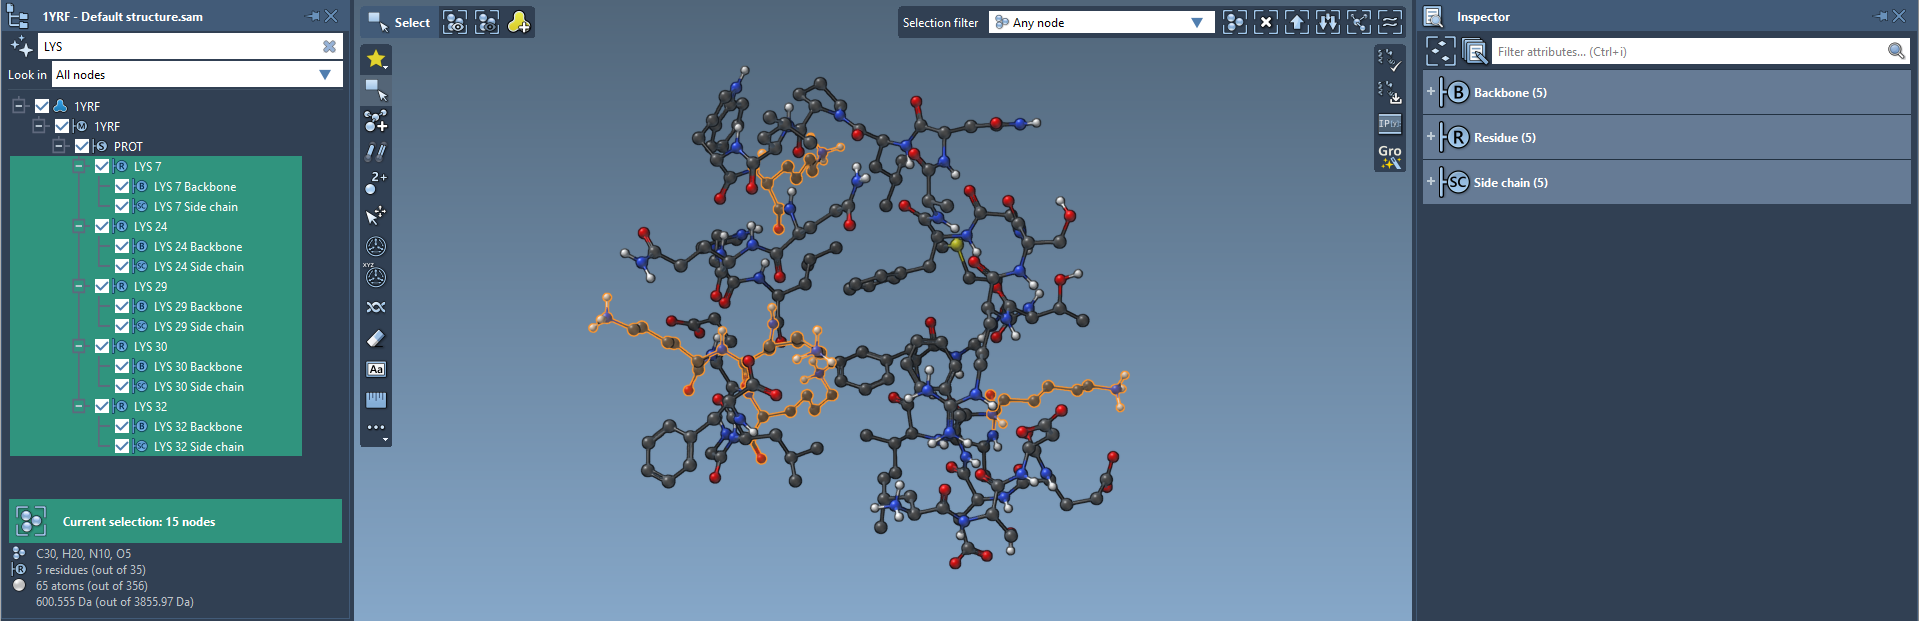
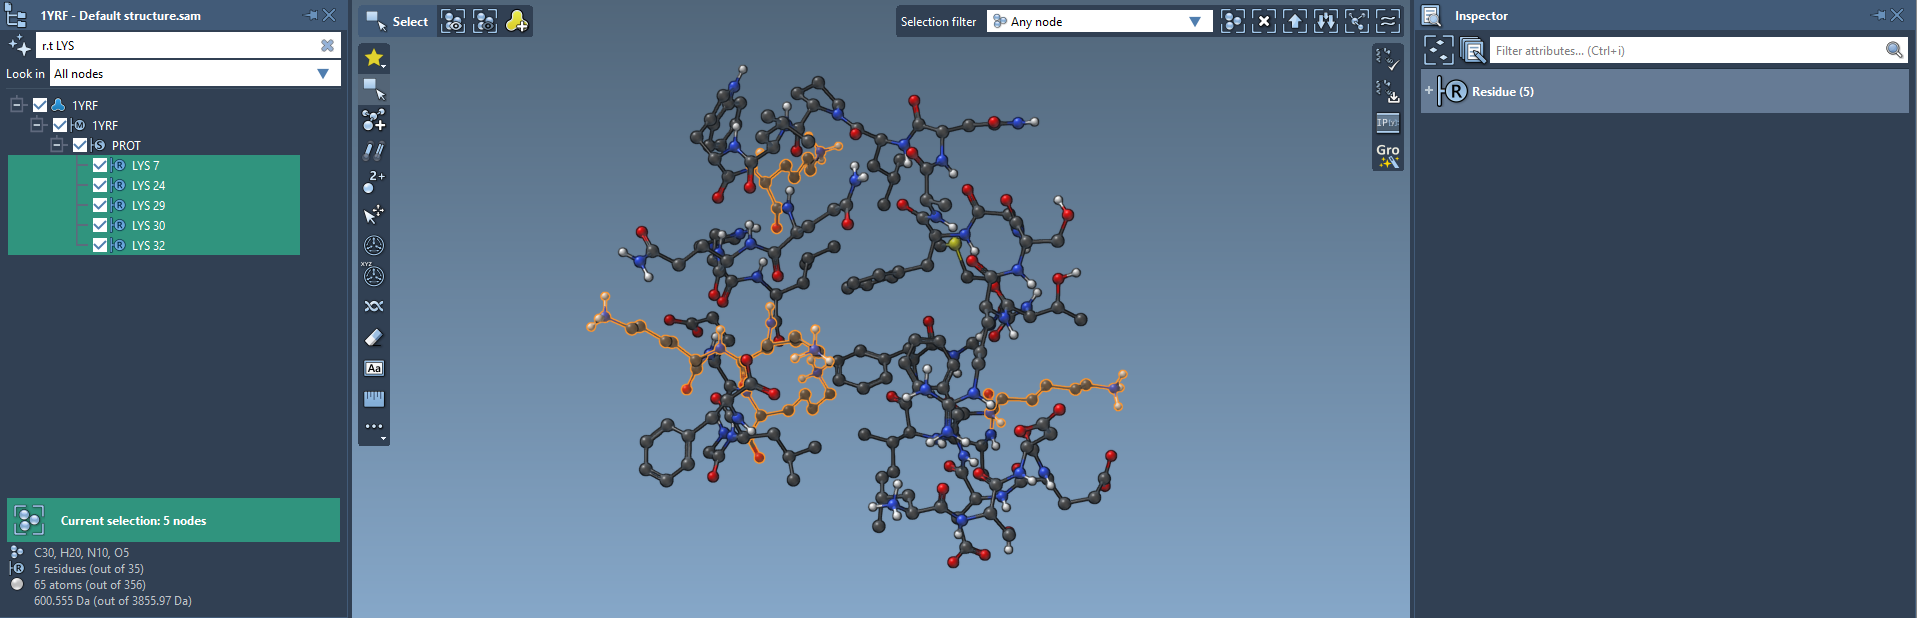
You might notice in the document view, in the selection summary, or in the inspector that 15 nodes were actually selected in total, while there are only 5 LYS residues, this is because backbones and side chains of LYS residues were as well selected, since their names also contain "LYS". Filtering by string is based on names of the nodes. For a more precise filtering you can use the Node Specification Language. To choose only LYS residues, type the following Node Specification Language expression: residue.type LYS (or a short version r.t LYS). Press Enter to select the nodes matching the filter. You should see that only the LYS residues are selected now.
Note: If you have the inspector opened (Interface menu > Inspector or the Ctrl + 2 shortcut on Windows or Linux or Cmd⌘ + 2 on Mac), you can see in it some detailed info on the selected nodes. The inspector is a powerful tool with which you can view and edit properties of selected nodes. Please, see Inspecting to learn more about how to work with the inspector.
See Selecting using the Node Specification Language section to learn more about how to select nodes using Node Specification Language expressions.
Selecting using Editors
SAMSON provides a rectangle selection editor (![]() ) to perform selections in the viewport. You can find the selection editor, as all other editors, in the left-side menu in the Viewport. The selection editor is set as the active editor when you start SAMSON.
) to perform selections in the viewport. You can find the selection editor, as all other editors, in the left-side menu in the Viewport. The selection editor is set as the active editor when you start SAMSON.

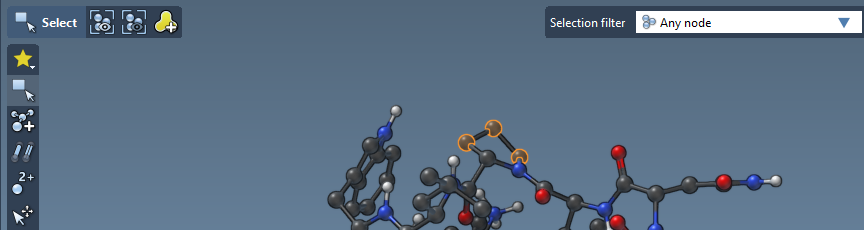
The rectangle selection editor acts in two modes:
- a point selection in which it selects when you click on nodes,
- a rectangle selection in which it selects via a rectangle.
To select a node in the viewport via a point selection, left-click on it in the viewport. To select more than one node, hold Ctrl / Cmd⌘ . To remove a node from the selection, hold Alt .
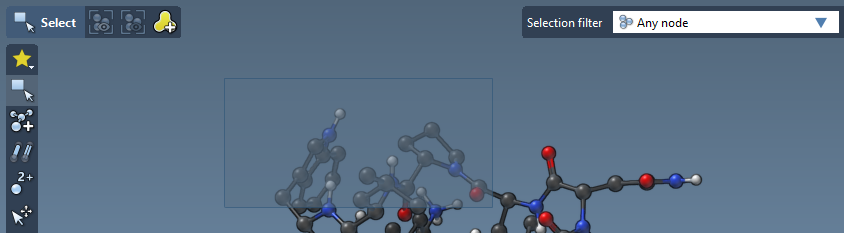
To select nodes in the viewport via a rectangle selection, left-click and hold in the viewport and start moving your mouse, you will see the rectangle, once you release the left button the nodes behind the drawn rectangle will be selected. To select more than once, hold Ctrl . To unselect using the rectangle selection, hold Alt .
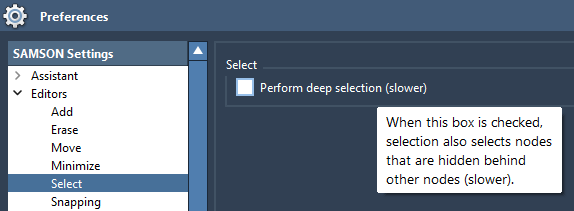
The rectangle selection can either select or not select nodes hidden behind other nodes. To modify this setting, go to Preferences > Editor > Select and change the "Perform deep selection" option. Note that the deep selection is significantly slower.
The selection level at which the selection editor operates depends on the selection filter (more on it in the next section) which you can find in the top-right corner of the viewport.
For example, if the selection filter is set to "Residues" then the selection editor will be selecting on the residues level when you click on an atom in the viewport.
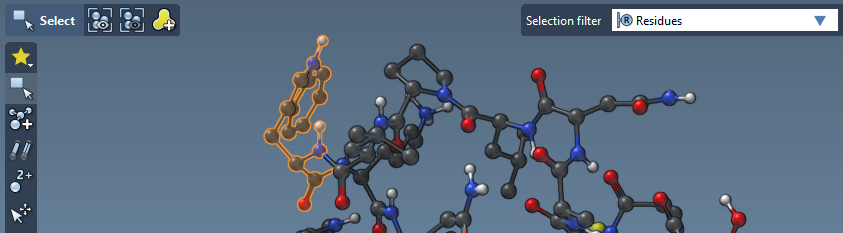
See Selection filters for more information.
Tip: To center the camera on the selection, press Shift + Space .
Selection filters
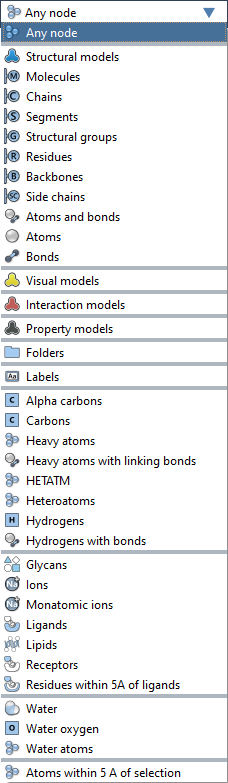
The selection filter governs at which node level the rectangle selection editor and some other editors operate. The selection filter is in the top-right corner of the viewport. By default, the selection filter is set to "Any node".
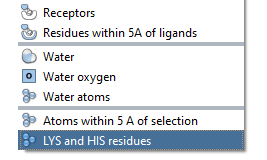
SAMSON provides a number of selection filters by default, and you can add your own selection filters (see Selecting using the Node Specification Language).
To the right of the selection filter, you can find some common selection actions, some of them are enabled only if the selection is not empty:
 Select all: selects all selectable nodes in the active Document based on the current selection filter.
 Deselect all: deselects all selected nodes in the active Document.
If the selection filter is set to "Any node", then when you click on the "Select all" button (![]() ) just next to the selection filter, then it will select all the nodes present in the Document.
) just next to the selection filter, then it will select all the nodes present in the Document.
To clear the selection, click on the "Deselect All" button (![]() ).
).
If the selection filter is set to "Residues", then the selection editor will be selecting on the residues level when you click on an atom in the viewport. If you click on the "Select all" button (![]() ), then it will select all residues present in the Document.
), then it will select all residues present in the Document.
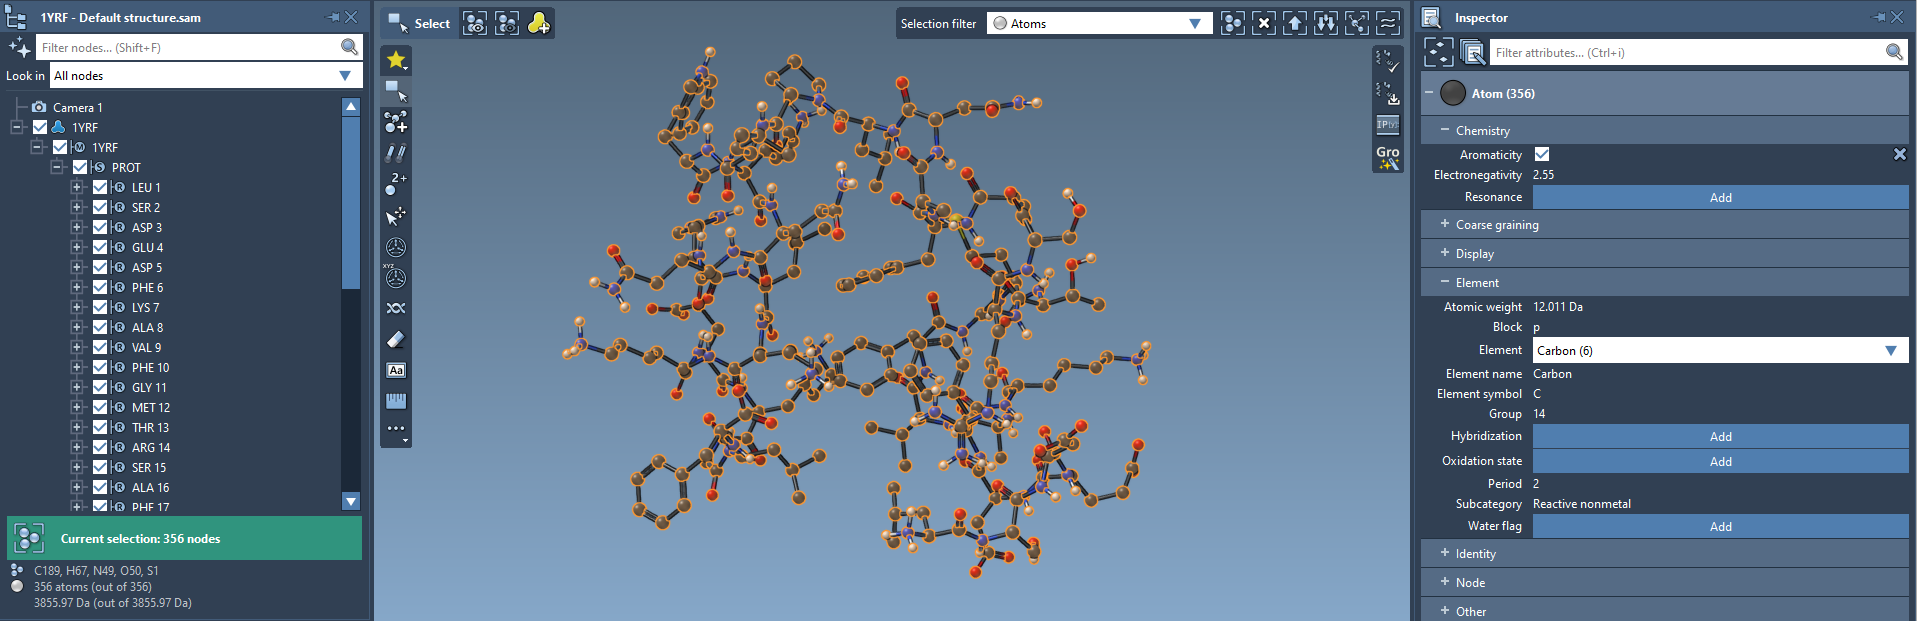
If the selection filter is set to "Atoms", then when you click on the "Select all" button (![]() ), then it will select all the atoms present in the Document.
), then it will select all the atoms present in the Document.
Reset the selection filter to "Any node".
Selecting using the Node Specification Language
You can use the Node Specification Language (NSL) for selecting nodes in the document view filter as it was shown in the Selecting using the Document View section, or by using the Find window. The Find window can be opened via the Ctrl + F shortcut on Windows and Linux or Cmd⌘ + F on Mac or by clicking on Select menu > Find (![]() ).
).
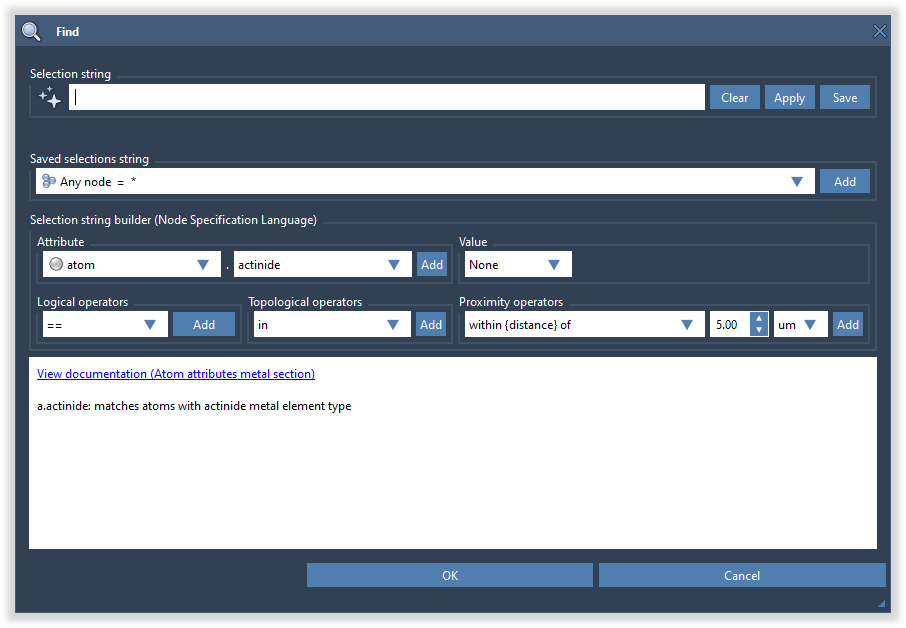
See the Node Specification Language section to learn more about it.
Saving selection filters
A Node Specification Language expression can be saved as a selection filter. To do so:
- Open the Find window (Select menu > Find
 , Ctrl / Cmd⌘ + F ).
 - Type a selection string.
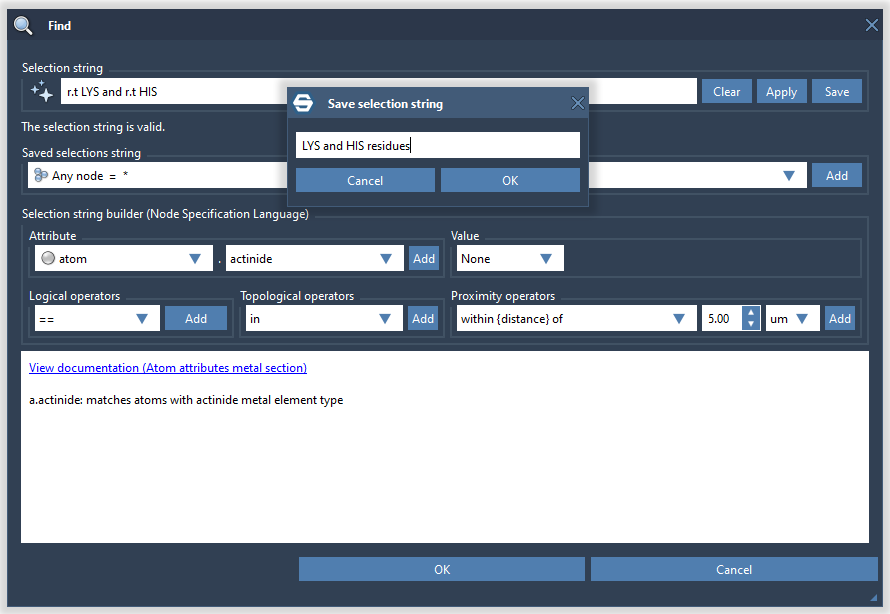
- Click "Save".
- Enter the name for the selection filter - it will be shown in the selection filter list. - and click "OK".
Let's save the selection filter which gives us LYS or HIS residues: r.t LYS or r.t HIS. Click on the Save button and name it "LYS and HIS residues" then press Ok or Enter .
The newly added selection filter should appear at the end of the selection filter list.
You can remove any filter or reset all the custom filter. To remove a custom filter, set this filter as the active one and right-click on the selection filter list.
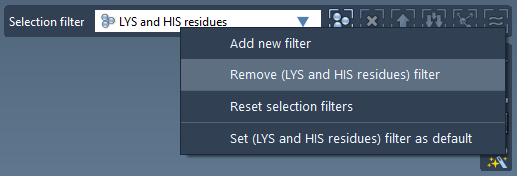
Important: Clicking on the "Reset selection filters" will remove all the selection filters added by you.
Saving the selection as a group
In SAMSON, selections can be saved as groups that reference the nodes. This is useful, for example, to have a fast access to some nodes and to perform some set actions on selections (e.g., an intersection).
Important: A group does not contain the nodes it refers to, but only links to them. If you select a group but some of the nodes were deleted, only the still existing nodes will be selected.
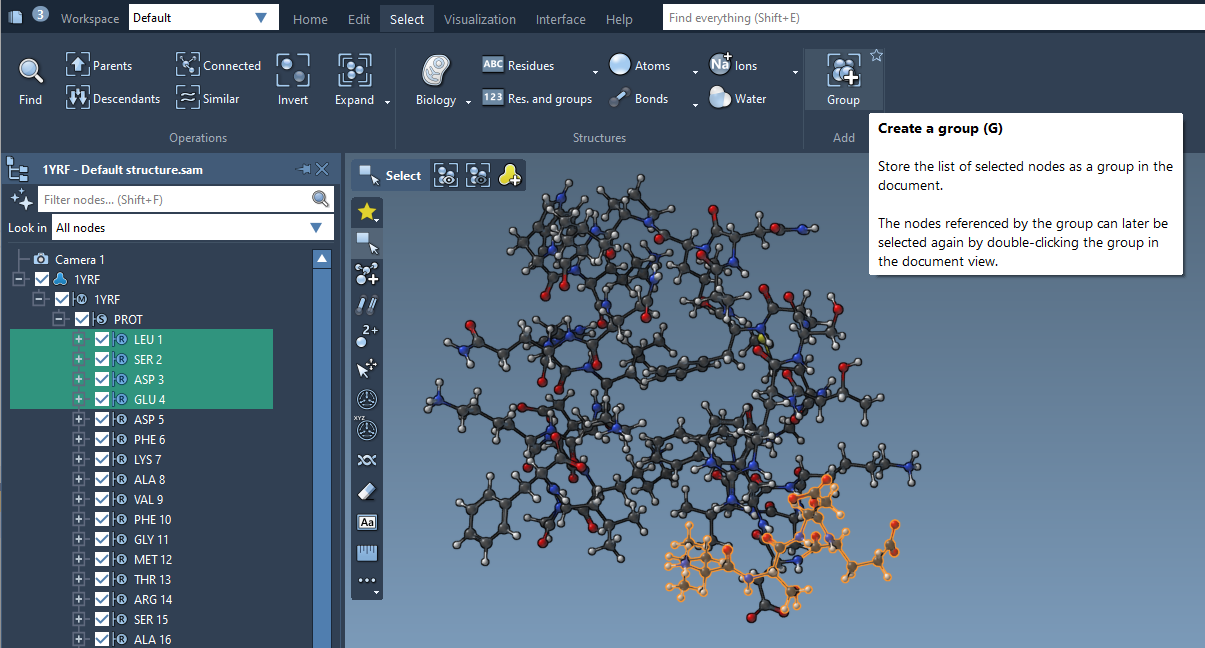
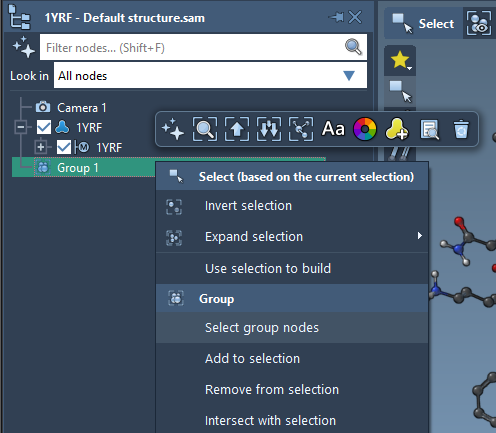
Open a molecule and select some atoms. Right-click on the selection and click on Select menu > Group (![]() ).
).
In the pop-up dialog, provide the group name.
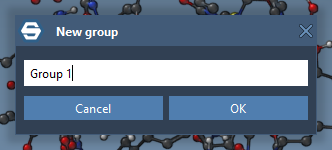
The newly created group will be added to the end of the Document, and you should see it in the document view.
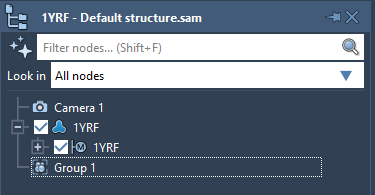
You can perform different actions with a group.
Inverting and expanding selections
To invert the selection, click Select menu > Invert or right-click on the selection either in the document view or in the viewport and, in the context menu, click Invert selection.
To expand the selection, go to Select menu > Expand or right-click on the selection either in the document view or in the viewport and, in the context menu, go to Expand selection and choose how to expand the selection.
