

The fastest way to visualize a molecular system is by applying visual presets to it. Visual presets provide an efficient way to apply multiple visual representations and color schemes simultaneously to a complex molecular system, all in just a few clicks.
Visual presets rely on Selectors to automatically determine where visual representations and color schemes are applied (e.g. the receptor, ligands, waters, binding site, etc.) and what is to be hidden if chosen so.
SAMSON provides a set of default visual presets and you can create and save your own visual presets, e.g., by modifying the existing ones.
Applying visual presets
Click on Visualization menu > Visual model > Visual preset in the pop-up window, select a visual preset among the existing ones and click apply.
The visual preset is applied to the selected nodes or to the whole document if nothing is selected. The visual models created by the visual preset are stored in the document in a folder named based on the visual preset.
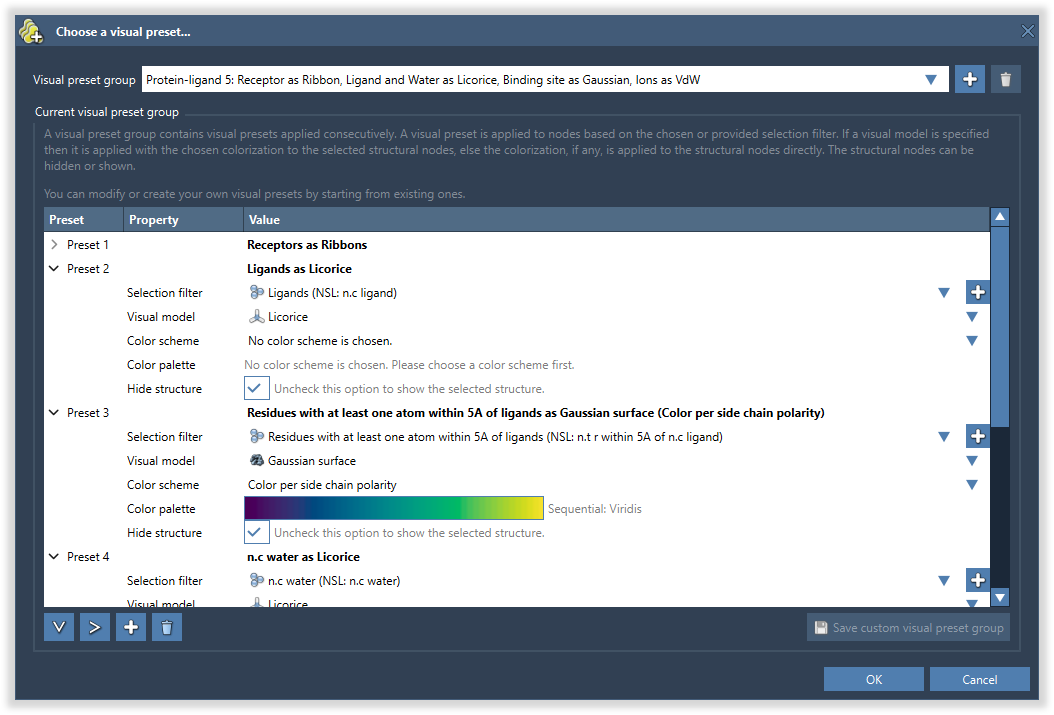
In the example below, the receptor is shown as ribbons, ligands and waters are represented as licorice, and ions are shown through a van der Waals representation in just a few clicks.
Creating visual presets
You can create and save your own visual preset groups either by modifying the existing ones or by creating a new one from scratch. Your saved visual presets will be loaded along with the default ones every time you launch SAMSON allowing you to create visualizations and images in the style you want in just a few clicks.
You can choose a selector, a visual model, colorization (default colorization, a color scheme or a constant color), and whether to hide the structural nodes selected by the selector.
If you want to create a visual preset group based on an existing one, then simply choose it from the list and start modifying it by adding or removing visual presets from the group, choosing selectors, visual models, color schemes, color palettes.
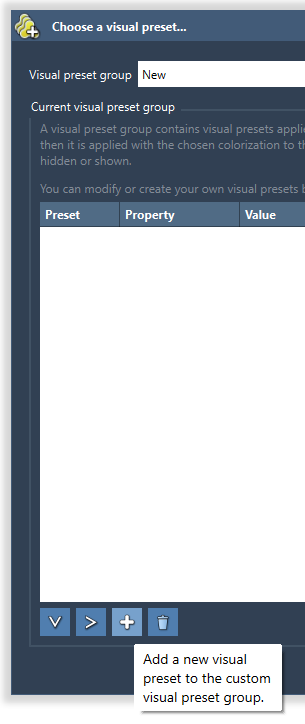
If you want to create a custom visual preset group from scratch, then click on the plus button next to the list of the existing visual presets.

Then click on the plus button below to add a new visual preset to the group.
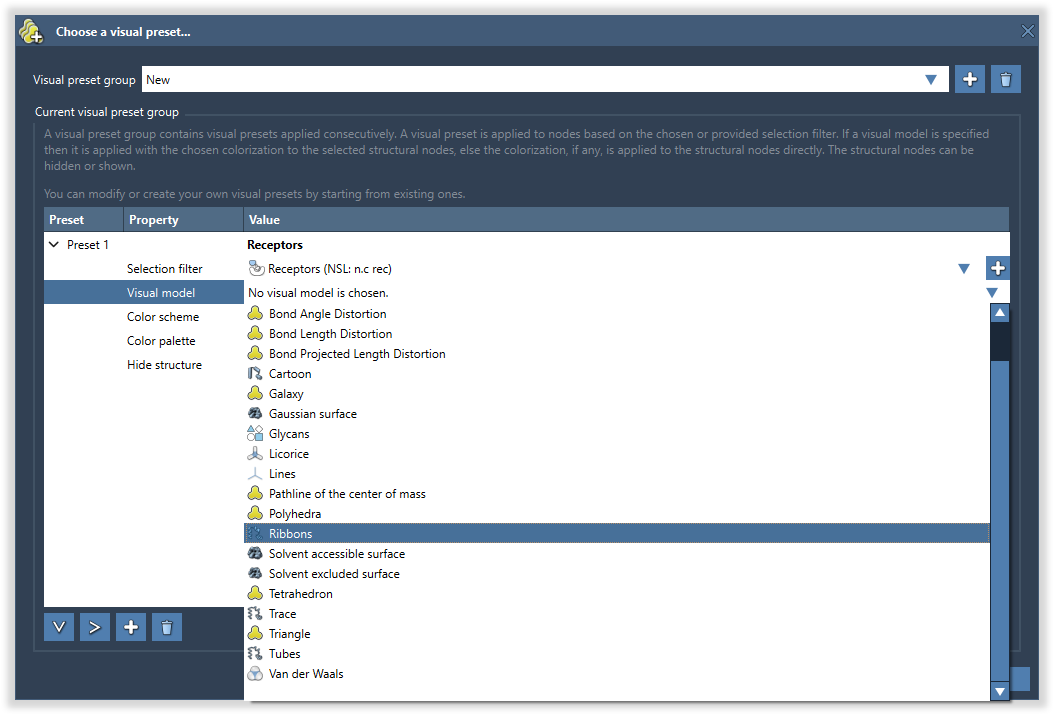
Let's now choose a selector. Selectors automatically determine where visual representations and color schemes are applied. There is a number of default selectors, e.g.: receptor, ligands, waters, binding site, etc. By default, when you adding a new visual preset, the selector is set to All which means that this visualization will be applied to the whole document if nothing was selected or to the current selection to which the visual presets are applied. Choose from the list a selector.

Now, let's choose a visual model from the list. If no visual model is chosen then the colorization, if specified, is applied to the structural nodes determined by the selector.
If no color scheme is chosen and there is a visual model specified then the visual model will have its default colorization. Choose a color scheme from the list. You can choose between no colorization, CPK colorization, constant color, and different per-attribute color schemes.
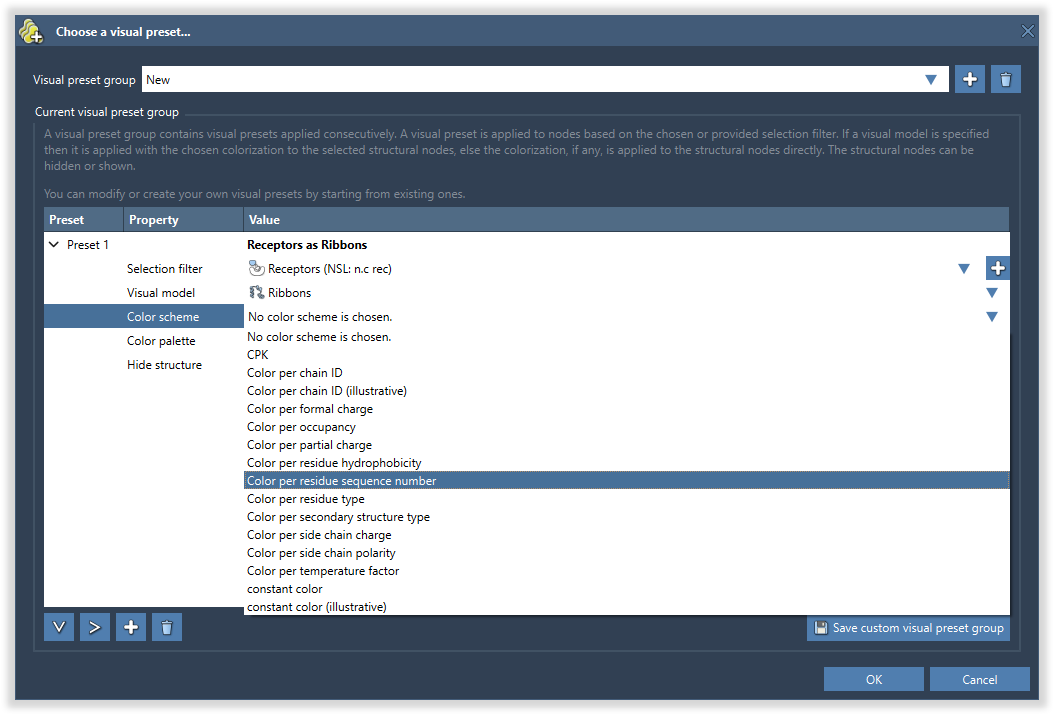
If a color scheme is chosen, then its default color palette will be shown in the color palette cell. If you want to modify the color palette, then double-click on it and choose (or create one) in the pop-up Choose color palette... dialog.
If a constant color was chosen as a color scheme, then you can modify the color by double-clicking on the cell.
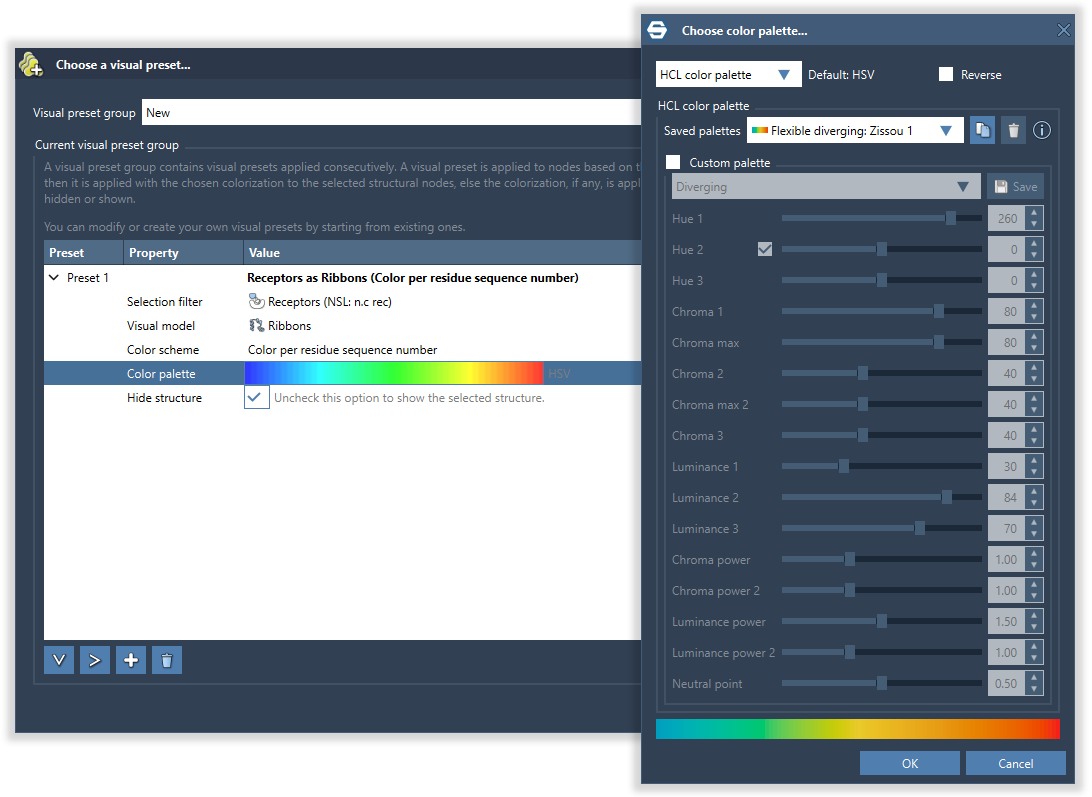
You can always return to the default color palette associated with the chosen color scheme by double-clicking on the color palette field and selecting the Default color palette in the Choose color palette... dialog.
If you want to delete a visual preset from the group, then click on the visual preset line and then click on the Delete (bin) button.
If you want to save your custom visual presets click on the Save custom visual preset group button or simply click on the OK button to apply it - you will be asked whether you want to save it or not.
Would you like your visual presets to be added to the list of default visual presets in SAMSON? Then please contact us using the Send feedback button in the top-left part of SAMSON.
See also: Color schemes, Visual models, Visualizing, Colorizing, Presenting and animating