

The Orbit camera animation makes the camera orbit around its target point.
See also: Move camera animation.
Adding the animation
First, orient the view/camera in the plane in which you want it to be rotated around the object.
Then, double-click on the Orbit camera animation effect in the Animation panel of the Animator.
Set the end frame of the animation as needed.
Note: In the movie we use the Animation menu which is no longer present in SAMSON - you can access all animations via the Animation panel and all presentation actions via the Animator's controls.
Properties
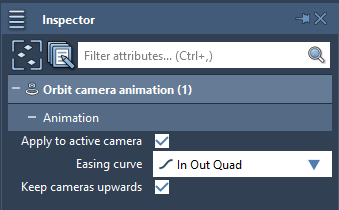
By default, camera animations are applied to the active camera (to change that, inspect the animation and modify the "Apply to active camera" option). So, the target point of the Orbit camera animation will be defined as the current target position of the active camera, which is basically the current center of the view.
The orbit rotation plane will be defined differently whether you have the grid in the viewport switched on or off:
- grid is off: the rotation plane will go through the central horizontal line of the viewport and the target point.
- grid is on: the rotation plane will go through the central horizontal line of the viewport in the plane parallel to the grid plane. To change how the animation behaves depending on whether the grid is on or off, inspect the animation and modify the "Keep camera upwards" option - if this option is checked then it will depend on whether the grid is on or off.
You can also change how the camera's parameters are interpolated between the frames by modifying the Easing curve.
Adjusting camera positions
You can adjust the target point and the rotation plane using the animation controllers.
All the camera animations have specialized camera controllers allowing for fine positioning of the camera: the central/target point, camera orientations, etc. In the viewport, you can see the associated keyframe numbers shown near the keyframe camera animation controllers. Let's see how can the Orbit camera positioning be adjusted. Note, if you don't see the camera controllers, you might need to zoom out in the viewport (use the mouse scroll button or press Ctrl / Cmd⌘ + - ).
While editing camera positions, Thumbnails automatically appear at the bottom of the viewport to help you frame the best shots.
Examples
Some examples of presentations available on SAMSON Connect - Documents that use this animation: